Thursday, December 29, 2011

Chicken Minestrone

It's time to shed that holiday weight!! Without fail, I always manage to pack on a few pounds between Thanksgiving and Christmas. Maybe it was the excessive amount of cookie dough brownies, but it's hard to say... ;)

Unlike most New Yorkers, I'm stuck in the office this week so my healthy meal also had to be a quick one. I had left over chicken in the fridge, from you know where...Costco! After looking through my fridge, I discovered I had all the ingredients to make my own version of Minestrone soup, with chicken!! It was deeeelicious and super filling! (And healthy to boot!)

Recipe:
1 tbsp olive oil
1 medium onion
2 celery stalks, chopped
1 medium carrot, chopped
5 garlic cloves, minced
6 cups chicken broth
2 15 oz cans diced tomato
10 oz can Cannellini beans
15 oz can chick peas
1 tbsp all-purpose seasoning
1 tbsp dried oregano
1 1/2 cups pasta, any tube shape
Pre-cooked, shredded chicken

Directions:
1) Heat oil over medium heat. Add in onion, celery and carrot and saute until vegetables begin to soften, about 5 minutes. Add the garlic and saute for 1 more minute.
2) Add the tomatoes, broth, beans, chick peas and herbs and bring to a boil. Turn down and heat and simmer to 20 minutes. 
3) Add the pasta and cook for 6 minutes. Add in chicken and cook until chicken is heated through, about 3-4 minutes.
4) Let cool, serve and enjoy!

Monday, December 26, 2011

Merry Christmas!!

I hope everyone had a wonderful Christmas! Aside from great company, I received great gifts and over-indulged in some pretty amazing food!! 

I am a sucker for holiday treats and my contribution to our holiday feast did not make it easy for me to control myself. I've recently become addicted to Pinterest and can't stop finding recipe ideas...I'm on inspiration over load to say the least!! 

After seeing this recipe for Chocolate Chip Cookie Dough Brownies, I knew I was in trouble! These were one of the most delicious baked goods I've had yet! Soft, gooey cookie dough atop fudgey, moist brownies definitely hit the spot! (All 10 times that I had one!) ;)

Brownie Recipe:
1 box brownie mix, and all ingredients listed on the box

Cookie Dough Recipe: 
3/4 cup butter, at room temperature
3/4 cup light brown sugar, packed

3/4 cup granulated white sugar

3 tbsp milk

1 1/2 tsp vanilla extract

1 1/2 cups all-purpose flour

1 1/2 cups mini chocolate chips

1/2 cup semisweet chip

Topping:
Chunks of peppermint Bark 

Directions:
1) Prepare Brownies according to the directions on the box. Preheat oven to 325 degrees. Spray a 9x13-inch pan with nonstick spray. Spread batter into prepared pan. Bake 25 to 35 minutes. Watch closely and remove from oven when toothpick inserted into the center comes out clean. Let cool completely.
2) To make cookie dough,  in your mixer combine butter, brown sugar and white sugar. Mix in milk and vanilla. Mix in flour just until combined. Stir in chocolate chips.
3) Spread cookie dough over the cooled brownies. Top with crushed pieces of peppermint bark, of any size. (You can skip the peppermint bark all together, but I wanted to add a little Christmas flare!) 
4) Refrigerate until the dough is firm.  To speed up the process, you can place them in the freezer.  Use a sharp knife to cut the brownies. Serve and enjoy!

Tuesday, December 20, 2011

Nashville Weekend and Stuffed Pepper Soup

I'm so sad to see this weekend come to a close. After spending four days playing and chasing around my nephew I miss the little guy like crazy. All the fun we were having left little time to cook, but we definitely ate well all weekend!

On Friday night, I whipped up a batch of
cassoulet. It was a hit (even after my brother doubted me and served himself half a bowl...he went back for seconds!) Saturday, we ran errands all day but made a pit-stop at Ashley's parents house for some delicious homemade veggie soup. It was great! With a mix of potatoes, white kidney beans, Lima beans and veggies, this soup warmed our hearts and filled our stomach.

Sunday came a little too quickly but I was greeted bright and early with a southern classic: biscuits and gravy! I've never had them before but have seen it on countless menus. After lounging and laughing with Grady, we made lunch. Ashely found a great recipe for Stuffed Pepper Soup on Pinterest (which I am not addicted to!) While Ashley manned the stove, I was her sous-chef and handled the chopping. 


After about 45 minutes, we were eating one of the most delicious soups I've ever had. In one piping hot bowl we noshed on plentiful servings of fruits, protein, and grains and amazingly, this dish is only about 260 calories! I definitely suggest trying this one!

Chopped and ready for the pot!

Sauteing the peppers and turkey

Simmering

The finished product
Recipe:
1 cup uncooked brown rice
1 lb ground turkey
1 chopped green bell pepper
1 chopped red bell pepper
1/2 medium onion, chopped small
3 cloves garlic, minced
2 (14.5 oz each) cans petite diced tomatoes flavored with basil, garlic and oregano
1  14.5 - 16oz can tomato sauce
2 cups chicken broth
salt and pepper to taste

Directions:
1) In a large Dutch oven, brown ground turkey on high heat and season with salt and pepper. Drain any excess fat after thoroughly cooked then add peppers, garlic and onion. Cook for about 5 minutes on low heat. (These should not be very tender...they'll continue to cook later.)
2) Add diced tomatoes, tomato sauce marjoram and chicken broth. Cover and simmer on low heat for 30 minutes. 
3) Meanwhile, cook the rice as directed on the package. For one cup rice, cook with two cups of water. Bring to a boil then let simmer until water has evaporated. If it still tastes chewy, add a bit more water and let simmer until cooked through.
4) Once soup has simmered mix in cooked rice, season with salt and pepper to taste then serve.

Wednesday, December 14, 2011

Stay Tuned...

Hey everyone  - Just wanted to let you know you may not see me for a few days. I'll be busy chasing around the little cutie below. I'm heading to Nashville to visit my Brother, Sister-in-Law and handsome nephew, Grady. 

I will be doing a little cooking so I'll be sure to update you. (It may take some time though, considering I'll have to clean up after this guy first!) ;) 


Monday, December 12, 2011

Ingredient Remix: Ravioli in Sage-Butter Sauce

After last nights delicious meal, I couldn't help but think about how the rest of my unused sage was going to go to waste. I have a love-hate relationship with unique ingredients. I love trying them out, but hate that I rarely use what is left over. I just couldn't let this happen again.

Within a few short minutes, I knew exactly how I wanted to use my left-over sage: Ravioli with Sage-Butter Sauce. I'm embarrassed to admit it, but this use to be my favorite dish at Olive Garden. That is, until they took it off their menu because they found the sauce too hard to prepare. 

Really? I'm pretty sure the sauce took about 3 minutes to make and the ravioli in only 4. That's dinner in less than 10 minutes!! I wish every meal was that easy. This definitely should be added to your list of go-to weeknight meals. It will not disappoint. 

 Recipe: 
1 package, frozen meat ravioli
5 tbsp butter
10 sage leaves
juice from 1/2 lemon
Parmesan cheese

Directions:
While ravioli cooks, melt butter in a saute pan over medium-high heat until golden brown color appears along the outer edge of the butter. Add the sage leaves and remove from head. Squeeze in lemon juice and set aside. Drain pasta, leaving some cooking water and gently pour into serving dish. Pour butter sauce over pasta and sprinkle on cheese as desired.

Sunday, December 11, 2011

Lemon-Sage Chicken Breasts

The holidays are coming and my schedule is packed! Almost every night for the last two weeks I have had something planned after work. Sadly, while I am out having fun, you readers are probably getting worried! Yes, I'm still here...just not in the kitchen. 

I've had a wonderfully relaxing weekend and thought it would only be right to round the night out with a great meal. I wanted to try something refreshing but equally healthy. Lemon-sage Chicken with a side of Spinach and Swiss Chard hit the spot! 

This dish is amazingly easy and pretty delicious too! We opted out of starch with this meal, but you could easily serve it with a side of cous-cous or quinoa and it be equally great!

Recipe:
4 skinless, boneless chicken breasts (about 1 1/4 lbs)
4 tbsp olive oil
salt and pepper
2 large eggs
juice of 1 lemon
4 sprigs of sage, leaves only
3/4 cup cup chicken broth
1/2 cup white wine
1 tbsp butter
1 10oz package of mixed Swiss chard and spinach leaves

Directions:
1) Rinse and dry chicken. Sprinkle with salt and pepper. In a shallow dish, pour some flour and sprinkle with salt. In another shallow dish, lightly beat the eggs then add juice from the lemon. 
2) Heat 3 tablespoons of olive oil in a large skillet over medium heat. Dredge chicken in the flour, shaking off any excess. Next, dip in the lemon-egg mixture, coating both sides. Add the chicken to the skillet and cook until golden on the bottom, about 3 to 4 minutes. Add the sage to the skillet, then turn the cutlets and cook until golden on the other side, about 3 to 4 more minutes. Transfer cutlets and sage to a paper towel lined plate. 
3) Drain out any remaining oil from skillet. Add the win and chicken broth and cook over medium-high heat until reduced by half, about 5 minutes. Add the butter and stir until blended.
4) Transfer the chicken to a platter. Top with the fried sage then drizzle with the pan sauce. 
5) In the same pan the sauce was cooked in, add remaining tablespoon of olive oil to pan over medium high heat. Toss in chard and spinach leaves. Cook, covered for 1 minute. Stir, then cook for another minute. 
6) Remove from heat and plate with chicken. Enjoy!

Monday, December 5, 2011

Chicken and Sausage Jambalaya

Since I began this blog, I vowed to always tell the truth about the meals I've prepared. Last nights meal is one of those stories that just has to be shared! 

I need to start by mentioning the idea for this meal. It came to me when I was thinking about what I have stored in my freezer. I realized that I have tons of chicken breast and a few spicy sausage links. What could I make with these? Instantly, Jambalaya to mind. The funny part about this, I don't really care for cajun flavors in dishes, but I push myself to try new things. That is exactly what I did. Sundays meal plan = Chicken and Sausage Jambalay

Now that we're all up to speed, allow me to explain the fiasco that became of this dish. Obviously, the first rule to cooking so to read your recipe through before you begin cooking. Last night, I didn't bother to do that. I rubbed the chicken breasts with creole seasoning and began browning it in the heated oil. Within minutes, the creole season began to burn. Luckily, not in flames, but a stinky, black, smokey burn that I knew would ruin the dish. I removed the chicken and poured water in the pan to deglaze it. Once the burnt seasoning had softened, I cleaned my pan and started over.

This time, since I had already browned the chicken, I started to brown the sausage in oil. If I hadn't burned the pan the first time around, I would have had creole seasoning in the pan so I tossed a little bit in with the sausage. As that was browning I scanned the recipe. Oops! I was suppose to cook the sausage first, with no seasoning, all along. If I had done this, there would have been rendered fat from the sausage in the pan, preventing the creole seasoning from burning. Lesson learned. Read before you cook! 

Now on to the recipe...Don't skip anything! ;)
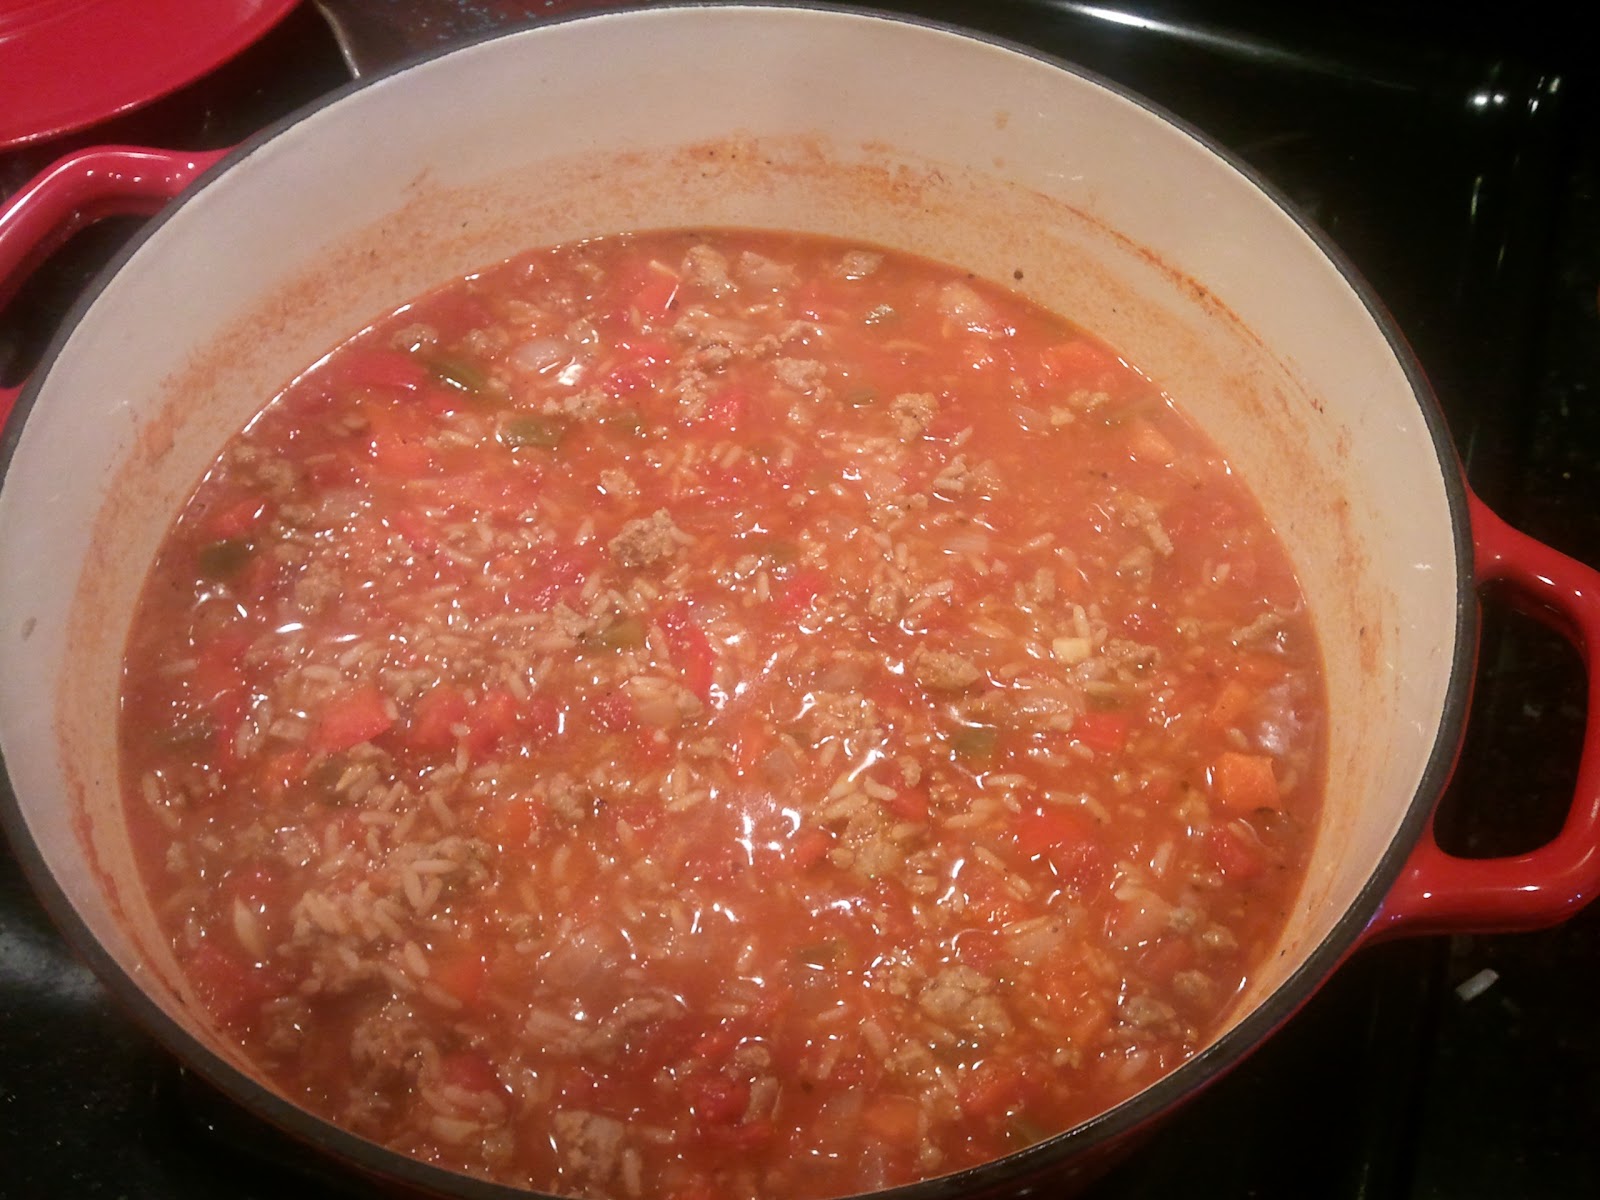
Recipe:
1 lb boneless chicken breasts, cut into 2 inch chunks
2 tsp creole seasoning
2 tbsp olive oil
3 links of spicy sausage
1 small red bell pepper, cut into 1 inch strips
1 small yellow bell pepper, cut into 1 inch strips
1 small green pepper, cut into 1 inch strips
1 medium white onion, diced
2 tsp dried thyme
2 tbsp all purpose flour
1/2 tsp cayenne pepper
1 cup raw brown rice
3 cups chicken broth
1 16 oz can diced tomatoes, in juice
parsley for garnish

Directions:
1) Season chicken with creole season. Heat oil in a Dutch oven over medium-high heat. Add sausage and brown for about 2 minutes. Transfer to plate. Add chicken and cook until browned, about 4 minutes. Transfer to plate.
2) Add peppers, onion, thyme, flour and cayenne to pot and cook, stirring continuously, until onions are translucent, about 4 minutes. Stir in rice then add brother and tomatoes. Bring to a boil. Once boiling, reduce heat to low. Cover and simmer for 10 minutes.
3) Stir in chicken and sausage, cover and continue to simmer for 12 minutes. 
4) Serve and garnish with parsley. This would be great with a fresh piece of bread. 

Thursday, December 1, 2011

Quick Fix: Shrimp and Tomato Quinoa

Wednesday night is never a great night for me to cook. I typically arrive home exhausted with little energy to cook. On a positive note, the cause for my fatigue relates to my love for food as well as helping others. I spend Wednesday nights chopping and prepping food at God's Love We Deliver (GLWD). 

GLWD's provides thousands of meals each week to women, men and children living with HIV/AIDS, cancer and other serious illnesses. These meals provide not only high-quality nutritious meals but also aid in boost the spirits of each client when their food delivery arrives to their home. 

My part in this wonderful organization begins at the root of each dish. Each week, I work with 10 to 15 other volunteers to slice and dice vegetables that are eventually used in soups, stews and side dishes. These are then incorporated into GLWD's daily menu and sent off to the clients. It is an amazing organization to be a part of. 

With that said, after two hours of chopping in the kitchen, I don't really feel like making dinner when I get home. I was fortunate enough to change all that tonight. On my ride home, I came up with a great, quick and healthy meal: Shrimp with Tomato and Quinoa. It was light and delicious but packed full of protein. 

 Recipe:
11 lb shrimp, peeled and deveined
2 tbsp olive oil
3 cloves garlic, minced
5 tbsp tomato paste
1/2 cup chopped tomatoes (I halved cherry tomatoes, but you can certainly use any kind you have on hand)
1 cup dry quinoa
2 cups water
salt and pepper to taste

Directions:
1) Begin by preparing your quinoa. Rinse one cup of dried quinoa and place in a pan with the two cups of water. Bring to a boil over medium-high heat. Once boiling, turn to low and let simmer until all water is absorbed and quinoa is fluff, about 20 - 25 minutes.
2) In a sautee pan, heat oil over medium heat. Add garlic and stir until fragrant, about 1 minute. Toss in shrimp and cooked all the way through,  about 2 minutes on each side. Push shrimp to the side of the pan, away from heat and stir in tomatoes and tomato paste. Cook, stirring occasionally, until tomatoes are tender.
3) Pull shrimp from side of pan and mix with tomato mixture. Top with quinoa and mix until cobined with tomatoes and shrimp. Season with salt and pepper to taste.

Saturday, November 26, 2011

Thanksgiving was a complete success!! I enjoyed the sights of the Macy's Thanksgiving Day Parade and successfully fulfilled my goal of stuffing myself to the gills.

My contribution to our Thanksgiving feast was one of my all-time favorites, S'mores Bars! And unfortunately, these ended up being my biggest pitfall. If I had to count, I would guess I ate between 7 to 9 small S'mores bars between Thursday and Friday. (That's a lot!)

And things didn't get any better. Today, my boyfriends mother and I had plans to bake cookies for her work event. We made two different kinds to see what was best. First, we started with Chocolate Peanut Butter Cup Cookies and second, Salted Caramel Chocolate Chunk Cookies. Since the goal was to pick he best cookie to make, I had to step up and be the taste-tester (no that she had to twist my arm.)
My vote was on the Salted Caramel Chunk cookies. They were amazingly great! We baked them in a muffin top pan to get perfect crispy edges. I could have eaten like 5 of these, but I contained myself.

The dueling cookies

Salted Caramel Chocolate Chunk Cookie Recipe:
2 sticks softened butter
3/4 cup granulated sugar
1 cup light brown sugar, packed
2 large eggs
1 1/2 Tablespoons pure vanilla
1/4 cup caramel sauce
3 3/4 cup all-purpose flour
1/2 tsp salt
1 1/2 tsp baking soda
12 oz bag mini chocolate chips
1 1/2 cups chopped good quality chocolate

Directions:
1) Preheat oven to 350 degrees.  In a stand mixer, beat the sugars and butter until well combined.  Beat in the eggs and vanilla until combined. Lastly, beat in the caramel sauce until well combined.
2) Place flour, salt and baking soda into a large bowl; mix.  Slowly add to wet ingredients then fold in the chocolate chips.  (Save chunks for later.)
3) Place about 1/4 cup of cookie dough and place into muffin top cups.  Press down then sprinkle with a pinch or two of sea salt, press chocolate chunks over top, then drizzle with additional caramel sauce.
4) Bake for 12-15 minutes or until just golden around edges.  Remove and let cool for 5 minutes before transferring to a cooling rack.

Chocolate Peanut Butter Cup Cookies:
1 1/2 cups, plus 2 tbsp all--purpose flour
6 tbsp cocoa powder
6 tbsp butter
1/2 tsp baking soda 
1/2 tsp coarse salt 
1/4 cup, plus 2 tbsp creamy peanut butter
1/2 cup granulated sugar
1/2 cup light brown sugar
1 egg
1 tsp vanilla extract
2 tbsp milk

2 cups coarsely chopped peanut butter cups, divided
  
Directions:
1) preheat oven to 350 degrees. Line baking sheets with parchment paper or silicone baking mats.
2) In a medium bowl, combine the flour, baking soda, cocoa powder and salt. In the bowl of an electric mixer, combine butter, peanut butter and sugars. Beat on medium-high speed until light and fluffy, about 1 to 2 minutes. Add in egg, vanilla and milk. Blend until smooth. With the mixer on low speed, mix in the dry ingredients until just incorporated. 
3) Add in 1 1/2 cups of chopped peanut butter cups and fold in gently.
4) Using an ice cream scoop (about 3 tablespoons), drop balls of dough onto the baking sheets about 2 to 3 inches apart. Gently press a few pieces of the reserved peanut butter cups on the top of each dough ball.
5) Bake for 12-14 minutes, rotating the pans halfway through baking. Let cool on the baking sheets for about 10 minutes, then transfer to a wire rack to cool. 


*Here are a few of my favorite floats and balloons from the parade, for obvious reasons! ;)


Wednesday, November 23, 2011

Chicken, Cranberry and Almond Quinoa Pilaf

With Thanksgiving being tomorrow, I have made sure to keep a balanced diet over the last few days in preparation for the big day. I know full well that come Thursday, I will be an eating machine! All of my meals this week have been low in carbs and heavy in protein.

Tonight was no different. My friend Lauren is staying over so that we can get up bright and early to watch The Macy's Thanksgiving Day Parade from Times Square. After explaining my pre-turkey day diet plan, we decided to have some fun cooking together.  Tonight's menu: Chicken, Cranberry and Almond Quinoa Pilaf.

The cranberries with the chicken tasted like a little Thanksgiving teaser, which we loved. And the tenderness of the quinoa with the crunch of almond added great balance to the dish. This is definitely a great meal to make when you're limited on time. It's fast and packed full of nutritious flavor!

Recipe:
1 tbsp olive oil
1 shallot, chopped
1 cup uncooked quinoa, rinsed and drained
2 cups chicken broth
1/2 tsp salt
2/3 cups dried cranberries
2/3 cups sliced almonds, toasted
2 pre-cooked chicken breasts, diced into 1/2 inch cubes

Directions:
1) Heat oil in a medium pot over medium-high heat. Add onions and cook, stirring frequently, until just softened, about 2 minutes. Add quinoa and toast, stirring constantly, for one minute.
2) Stir in broth and salt and bring to a boil then reduce to medium low. Cover and let simmer for 10 minutes.
3) Stir in cranberries, cover again and continue to cook until all liquid from the quinoa is completely absorbed, about 8 to 10 minutes. By this time, the quinoa should be tender.
4) Toss in heated chicken breast pieces and almonds. Season with salt and pepper to taste then enjoy!

Tuesday, November 22, 2011

Pumpkin Snickerdoodle Cookies

One of my favorite things about the holidays is baking! (Duh!) I absolutely love baking anytime of the year so It's safe to say that this time of the year, I bake on over-drive. 

Tonight, I had to whip up a treat for my boyfriend to bring to a work party. Since fall is winding down and winter will soon be upon us, I went with a spin on a traditional favorite: Pumpkin Snickerdoodle cookies. 

This cookie has the perfect mix of sugar and spice and everything nice. (Yes, so corny, but true!) Each bite has a little hint of pumpkin that takes the flavor of the cookie to a totally different level. I was told it was a hit amongst his co-workers, too. ;)
Recipe:
For cookie dough:

3 3/4 cups all-purpose flour
1 1/2 tsp baking powder
1/2 tsp salt
1/4 tsp ground nutmeg
1/2 tsp ground cinnamon
2 sticks butter, at room temperature
1/2 cup light brown sugar
1 cup graulated sugar
3/4 cup pumpkin puree
2 tsp vanilla extract
1 large egg

For cookie coating:
1/2 cup granulated sugar
1/2 tsp ground ginger
1 tsp ground cinnamon


Directions:
1) Combine flour, baking powder, cinnamon, nutmeg and salt in a bowl; whisk and set aside. 
2) In the bowl of an electric mixer, beat together sugars and egg on medium-high until light and fluffy, about 3 minutes. Blend in pumpkin puree. Beat in the egg and vanilla until incorporated. Turn the mixer down to low speed, add in dry ingredients and mix until just incorporated. Cover and chill dough for at least 1 hour.
3) Preheat oven to 350 degrees. Line baking sheets with parchment paper or silicone baking mats. Combine spices for cookie coating, blending until fulling mixed. 
4) Scoop the dough and roll into a ball. (I used a 3 tablespoon ice cream scooper to get the perfect size ball.) Roll dough ball in the cookie coating and place on the prepared baking sheets. Repeat with remaining dough, spacing them 2-3 inches apart. 
5) These need to flattened a bit. To do so, dip the bottom of a flat, heavy-bottomed drinking glass in water, then in the sugar-spice mix, and use the bottom of the glass to flatten the cookies slightly. Recoat the glass and repeat. 
6) Bake for 10-12 minutes. Let cool on baking sheets for about 5 minutes then transfer to wire cooling rack. 

Want to kick this recipe up a notch? Make little ice cream sandwiches with 2 cookies and your favorite ice cream flavor. I did - it was great!

Sunday, November 20, 2011

Meat Trio Pasta with White Bean and Red Pepper Bruschetta

Preparing a meal for friends and family is always a joy for me. There is no feeling better than sharing my love for food with others around me.

Last night, I had the pleasure of cooking for my boyfriend, his brother and girlfriend. When planning this meal, I knew I had to cook something pretty substantial. Both Christian and his brother eat like 500 pound gorillas. (Seriously!) If I prepared small portions, I would have been in trouble. 

I went with Three Meat Pasta and served it along side White Bean and Roasted Red Pepper Bruschetta. I knew meat, veggies, carbs and cheese would be a hit! Lucky for me, I was right!! After multiple servings we were highly satisfied. 

You have got to try this!


Meat Sauce Recipe:
1 combo pack of ground veal, beef and pork, about 1 1/2 lbs
1/4 cup extra virgin olive oil
1 large onion, diced
1/4 tsp red pepper flakes
6 cloves garlic, minced
1/4 tomato paste
2 28 oz cans of crushed tomatoes in juice
2 28 oz cans of whole pealed tomatoes in juice
2 tsp salt
black pepper
1 tbsp dried oregano
1 tbsp dried thyme
1 tbsp rosemary
2 bay leaves  

Directions: 
1) In a Dutch oven, heat olive oil over medium heat. Add pepper flakes and cook for about 15 seconds. Add the onion and cook until golden brown for about 15 minutes, stirring occasionally. 
2) Add garlic to onions and cook until fragrant, about 1 minute. Stir in tomato paste and cook, stirring continuously, for 1 minute. Add the cans of crushed tomatoes then add whole tomatoes, one at a time, crushing tomatoes by hand as you go. Season with 1 teaspoon of salt and pepper to taste. Simmer sauce over low heat, covered.
3) Heat a large skillet over medium-high heat. Add meat, thyme, oregano and rosemary. Season with the second teaspoon of salt and pepper to taste. Break up meat and cook until browned, about 8 minutes.
4) Once cooked through, add meat to the sauce, being careful not to add the fat and drippings from the meat. Cover the sauce and simmer over low heat for about 90 minutes.
5) Season with salt and pepper to taste. 

*Note: This makes a lot of sauce. You will definitely have some left over. Freeze and save for a later date.

 
Now on to our amazing side dish!

Bruschetta Recipe:
1 15 oz can cannellini beans
1/4 cup roasted red peppers, packed in oil
1 tsp fresh lemon juice
1/2 tsp salt
1/2 tsp black pepper
1 clove garlic
3 tbsp olive oil
1 French or Italian baguette

Directions:
1) Turn broiler on to preheat while preparing bruschetta.
2) In a food processor, add beans, red peppers, lemon juice, salt, pepper and garlic. Blend until almost smooth.
3) While food processor is running, slowly add oil and process until creamy.
4) Toast both sides of baguette in broiler. Top with bruschetta and enjoy!

Thursday, November 17, 2011

One-Pot Chicken Cacciatore

I rounded out my weekend of cooking with a full-flavored, hearty pot of Chicken Cacciatore. I absolutely loved this dish. The fragrance of the mushrooms, red bell peppers and tomatoes melding together was not only aromatic but enticing, making it really hard for me to not taste-test as I cooked. 


Luckily, I savored enough of the meal to serve over pasta and even had enough extra sauce to freeze for a later date. 

Recipe:
1 chicken (3 to 4lbs), cut into pieces
flour, for dredging
salt and pepper
3 tbsp olive oil
10 oz cremini mushrooms, quartered
1 yellow onion, chopped
1 large bell pepper, seeded and coarsely chopped
4 cloves garlic, minced
1/2 cup dry red wine
1/2 cup chicken broth
1 28oz can diced tomatoes, in juice
3 tsp dried oregano
2 tsp dried thyme 

Directions:
1) Combine flour, 1 teaspoon of salt and 1 teaspoon of pepper. Pat chicken dry and sprinkle with salt and pepper. In batches, dredge chicken pieces in flour mixture, shaking off excess flour.
2) Over medium heat, heat oil in a Dutch oven. Brown chicken in the pan, a few pieces at a time. Cook for about 5 minutes on each side. Remove and transfer chicken to a plate.
3) In the same pan, saute garlic, onion, mushroom and red pepper until just tender. Once tender, add wine and simmer until reduced by half. Next, add the tomatoes, broth and oregano. 
4) Return the chicken pieces to the pan and turn to coat in the sauce. Add the thyme to the sauce and bring to a simmer. Reduce heat to medium-low and cover. Simmer pot for 40 minutes. 

Wednesday, November 16, 2011

Semi-Homemade Apple Pie

The beautiful finished product!
As promised in my previous post, I have a great semi-homemade apple pie recipe that I tried out on Sunday. It was my first attempt at baking pie, so I kept it simple and purchased roll-out pie crust instead of trying to make my own. Eventually, I will take the time to make a complete pie from scratch, but after two days of cooking and third recipe to follow tomorrow. I figured cutting a few corners wouldn't hurt anyone.

I should be honest and mention that I had no special occasion planned to debut this pie, so instead I picked up a carton of Vanilla Bean ice cream and enjoyed a few pieces of this on my own. It was great! (And the sugar from the combo kept me awake extra late Sunday night.) ;)

Who doesn't love a little Apple Pie a la Mode?


Recipe:
3 lbs mixed apples (I chose McIntosh, Granny Smith and Gala)
2/3 cup granulated sugar
2 tbsp lemon juice
6 tbsp unsalted butter
1 tbsp all-purpose flour, plus more for dusting
1/8 tsp salt
3/4 tsp ground cinnamon
2 disks of 12" pie dough
1 large egg, beaten
sugar, for sprinkling

Directions:
1) Peel and core the apples slicing 1/4 inch thick. Toss with lemon juice and sugar. 
2) Heat 4 tablespoons of butter in a large skillet over medium-high heat. Add the apples and cook, stirring until tender, about 10 minutes. (Be sure not to overcook or you'll end up with mushy pie filling.) 
3) Stir in flour, cinnamon and salt cooking until thickened, about 1 additional minute. Remove from heat and let cool.
4) Roll out 1 disk of dough on a floured surface. Gently, ease into a 9" pie pan. 
5) Add the apples, forming a slight mound in the middle of the pan. Cut remaining 2 tablespoons of butter and scatter on top of apples. 
6) Roll remaining disk of dough. Carefully, lay over the filling pressing the edges of the crust together. Fold overhand pieces under itself and crimp together to seal. 
7) Brush with beaten egg and sprinkle with additional sugar, as desired. Cut a few slits on the top of crust. Chill for 1 hour.
8) Place a baking sheet on the lowest rack in the oven and preheat to 425 degrees for 30 minutes. (You oven should be preheated before the time is up, but continue the process until 30 minutes has passed.) 
9) Once oven and baking sheet are heated, place pie on the baking sheet. Lower the temperature of the oven to 375 degrees and bake until golden brown, about 1 hour to 1 hour, 10 minutes. (If the edges of the pie start to brown quickly, create a foil-covering and place atop edges of the pie.)
10) Let cool and enjoy!!

Tuesday, November 15, 2011

Chicken and Rice Soup

A little bowl for me, and a jumbo bowl for the man of the house.

Sunday, my inspiration continued and I whipped my first pie from scratch (post to come) and a new homemade favorite; Chicken and Rice Soup. Again, thanks to my friends at Costco, I was able to use rotisserie chicken to make this soup easy to prepare and incredibly hearty. I also had left-over celery, onion and carrots from my Cassoulet recipe from the day before. I was cooking in no time (and spent very little money to do so.)

Recipe:
1 tbsp olive oil
2 cups shredded rotisserie chicken 
1 medium onion, chopped
2 cloves garlic, minced
3 medium carrots, cut diagonally, into 1/4 inch slices 
3 ribs celery, halved then cut diagonally into 1/4 inch slices
1 tbsp thyme
1 bay leaf
2 qts chicken broth
1 cup water
1 cup brown rice
salt and pepper to taste

Directions:
1) In a Dutch oven over medium heat, add olive oil, onion, garlic, carrots, celery, thyme and bay leaf. Cook, stirring occasionally for about 6 minutes, until veggies are softened. 
2) Add in chicken broth and water. Bring to a boil. Add the rice and chicken then season with salt and pepper.
3) Cook on medium-low heat until the rice is tender, about 30 minutes.

Monday, November 14, 2011

Cassoluet

Saturday was an inspirational day for me. I sat in front of the TV and watched Cooking Channel and Food Network all day long. Even though I work at a culinary school and my cube mates poo-poo the shows on these networks, I still LOVE them. Even when I have no intention of cooking a recipe shown, I still enjoy the personalities and choice of set that each Chef has.

One of my favorites Cooking Channel personalities is Kelsey Nixon. She comes off as your average home cook, but has so many great tips and techniques to share. In one of her episodes of Kelsey's Essentials yesterday, she made three different meals using one-pot cooking methods. I instantly fell in love with two out of the three. The first was this post: Cassoulet. The second will follow in a few days (chicken cacciatore, for those who can't wait.)  


Judging by the amount of ingredients, this dish may appear a bit complicated but it honestly isn't. Once all of your veggies are prepped and all of the food is in the pot, you have 40 minutes to sit back with a glass of wine and relax before digging in! This is definitely a great winter dish and could really wow your guests at a dinner party.  (Plus, who wouldn't love a big bowl of bacon-y veggie goodness?!?)

Recipe:
3 tbsp olive oil
1/2 lb hot Italian sausage
1/2 lb slab bacon, cut into cubes
1 medium onion, diced
3 medium carrots, diced
2 stalks celery, diced
1 medium zucchini, diced
4 cloves garlic, smashed
1 14.5 oz can of diced tomatoes
2 tsp dried thymes
1 tsp dried rosemary
2 cups chicken broth
3 15.5 oz cans of cannellini beans, drained and rinsed
1 cup bread crumbs
3 tbsp butter, melted
salt and pepper

Directions:
1) Preheat oven to 350 degrees. 
2) In a large Dutch oven, heat oil over medium heat. Add the sausage and bacon to brown all sides, breaking up with the back of a wooden spoon, about 10 minutes. Remove all but 2 tablespoons of fat.
3) Add onion, carrots, celery and garlic and saute until just fragrant, scrapping up any browned bits. Add zucchini, diced tomatoes, thyme, rosemary chicken broth and cannellini beans. Bring mixture to a simmer.
4) Place the Dutch oven into the preheated oven for 30 minutes. 
5) In a bowl, mix melted butter and breadcrumb. Remove the cassoulet and sprinkle with breadcrumb mixture. Place back in oven for another 10 minutes or until the top of the cassoulet is golden brown.

Monday, November 7, 2011

Chocolate Pumpkin Cupcakes

Yesterday, thousands of runners hit the streets during the New York City Marathon. Every year, I watch in awe and for a brief moment feel inspired to run it myself. Then I take another few steps towards my friends apartment, out of breath, and I'm over it. 

I'll be the first to admit, the only way you'd ever get me to run a full marathon would be to pay me a hefty amount of money. I have done two half marathons in the past, but that was more than enough running for me.

While you will never find me running for an extending period of time, you can be sure that I'll be the first to bring delicious baked goods to any party. And that I did. Every marathon day, we gathered at our friend Matt and Meg's place for a Marathon Party. They have an amazing terrace with a great view of the race. We gladly enjoy the sights of the race with a cold beer and tasty treats in hand. 

With my fall spirit still running high (pun intended), I whipped up a batch of chocolate pumpkin cupcakes. This may sound a bit odd, but don't fret. The cake only has a subtle cocoa kick but is bursting with pumpkin flavor. They were an instant hit.


Cupcake Recipe:
2 2/3 cups all-purpose flour
3 tbsp cocoa powder
2 tsp baking powder
2tsp baking soda
1 tsp ground cinnamon
1/8 tsp nutmeg
1 tsp salt
1 15oz can pumpkin puree
1 cup granulated sugar
1 cup brown sugar
1 cup veggie oil
4 large eggs

Whipped Frosting Recipe:
2 1/4 cup heavy cream, chilled
1/4 cup confectioners' sugar

Directions:
1) To make cupcakes, preheat oven to 350 degrees. Line cupcake pans with paper liners and set aside. 
2) In a medium bowl, combine flour, cocoa powder, baking powder, baking soda, cinnamon, nutmeg and salt. Stir together and set aside.In the bowl of an electric mixer, blend together the pumpkin, sugars and oil. Add the eggs one at a time, beating well after each. On low speed, slowly add flour mixture until just incorporated.
3) Fill the cupcake liners until about three-quarters full. (I use a three-tablespoon ice cream scooper. It's easy and consistent.) Bake for about 18-20 minutes, until the cakes are golden. Move to a cooling rack and let them sit until completely cooled. This may take some time, but the whipped frosting could melt if not cooled completely.
4) To make the frosting, put heavy cream in the bowling of an electric mixer fitted with the whisk attachment. Whip on medium-low speed at first, gradually increase to high speed. Gradually, blend in confectioners' sugar. Whip until stiff peaks form. Be careful not to over-beat. (It can be tricky to tell when it is ready, but if you over-beat the cream and sugar will become a buttery consistency.) Pipe directly onto the cooled cakes. 

I topped mine with a bit of shaved chocolate as a little hint to what's inside. Enjoy!

Wednesday, November 2, 2011

Angel Hair Pasta with Shrimp and Tomato

I often find myself thinking about dinner on my way home from work, and by thinking, I mean scrambling to think of what to cook. Tonight, was no exception. I had to pick up a few things at the grocery store so I decided to let my inspiration come while shopping.

Low and behold, I didn't even make it to the grocery store before realizing what I had to make. Shrimp pasta! I opted for  frozen shrimp so I could create other dishes in the future, but also because it was on sale. 

Who needs a serving dish when you have a perfectly good satuee pan to work with!

 
Recipe:
1 lb frozen shrimp, thawed, deveined and tails removed
3 tbsp olive oil
1 tbsp of butter
4 cloves garlic, minced
1/2 lb angel hair pasta
1/4 cup tomato paste
1 cup cherry tomatoes, halved
salt and pepper to taste
2 scallions, thinly sliced for garnish

Directions:
1) Cook pasta according to package. Strain, and set aside.
2) Heat 2 tbsp of oil and butter in a sautee pan over medium-high heat. Add garlic and cook until fragrant, about 1 minute. Add shrimp and cook until 2-3 minutes per side. Push shrimp to the side of the pan, removing that corner of the pan from heat.
3) Add the tomatoes and paste to pan and cook until tomatoes begin to soften. Be sure to stir paste in with oil, creating a smooth oil sauce. Add remaining tablespoon of oil and continue stirring. 
4) Pull shrimp from side of pan and begin mixing with tomato/oil sauce. Add noodles and toss with salt and pepper to taste. Top with scallions to serve.

This recipe was an experiment-in-the-making for me, but it came together very nicely. It only took about 15 minutes to prepare but looked like much more effort than that. While it began as adding a little of this and a little of that, I absolutely loved it and am sure this will be a new go-to in my house.